
How to Make Easy Wire Wrapped Rings
by Lizzie Baum
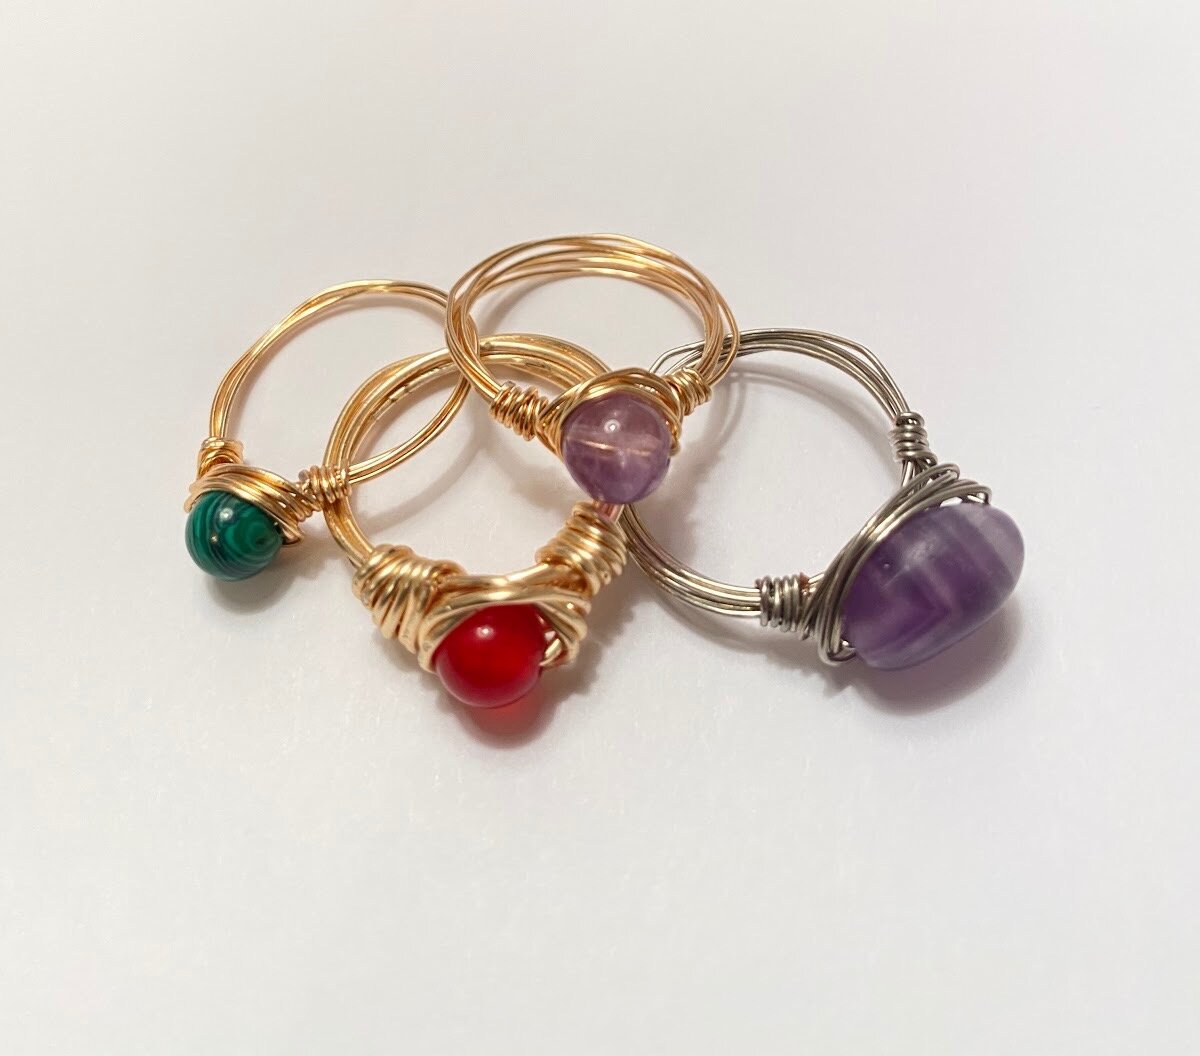
Since March of 2020, when COVID-19 lockdowns began, it seems as though everyone has jumped on the DIY bandwagon, making things ranging from homemade cloud bread and tie-dye to jewelry. One of the hottest DIY trends at the moment is wire-wrapped rings. You can find them on Etsy, but these are fun and easy to make at home for something more personal.
Once you make a few of these rings and get the hang of the technique, you can really get creative with colors, wire weight, and beads. There are endless options out there for beads ranging from pretty glass and ceramic options to polished and natural stone and crystal beads. Before you know it, you may end up with enough rings to wear a different ring on every finger for a month!
Supplies
You can find everything you need to make these rings at Michael’s, JoAnn Fabric and Crafts, Amazon or, if you prefer to support smaller local businesses you can check out Beads of Paradise or BeadKraft either in person or online for some more interesting bead options and knowledgeable salespeople.
The links included below will give you an idea of what you are looking for, but any of the above retailers will have these supplies available often at a range of price points depending on the materials and quality you choose.
20 gauge wire in any color you want to work with
https://www.beadkraft.com/20-ga-non-tarnish-wire-gold-15-yards
Small beads
https://www.beadkraft.com/10mm-smooth-round-natural-rose-quartz-beads-16-strand
Needle nose pliers and a wire cutter
https://www.michaels.com/jewelry-pliers-tool-set-by-bead-landing/10334538.html
A cylinder to wrap the wire around - a highlighter, marker, or mascara tube works well, or you can get a ring sizer for just a few dollars. https://www.amazon.com/dp/B08C5LQ8D6/ref=cm_sw_em_r_mt_dp_2427D9PAFP33ND3M0STZ?_encoding=UTF8&psc=1
Instructions


Step One:
Cut a 12-16 inch long piece of wire with the wire cutter. Any color wire you like will do, but definitely stick with craft-type wire, so it does not rust! 20 gauge is a great weight to work with, especially if you are just starting, but you can experiment with different weights for different looks.
Step Two:
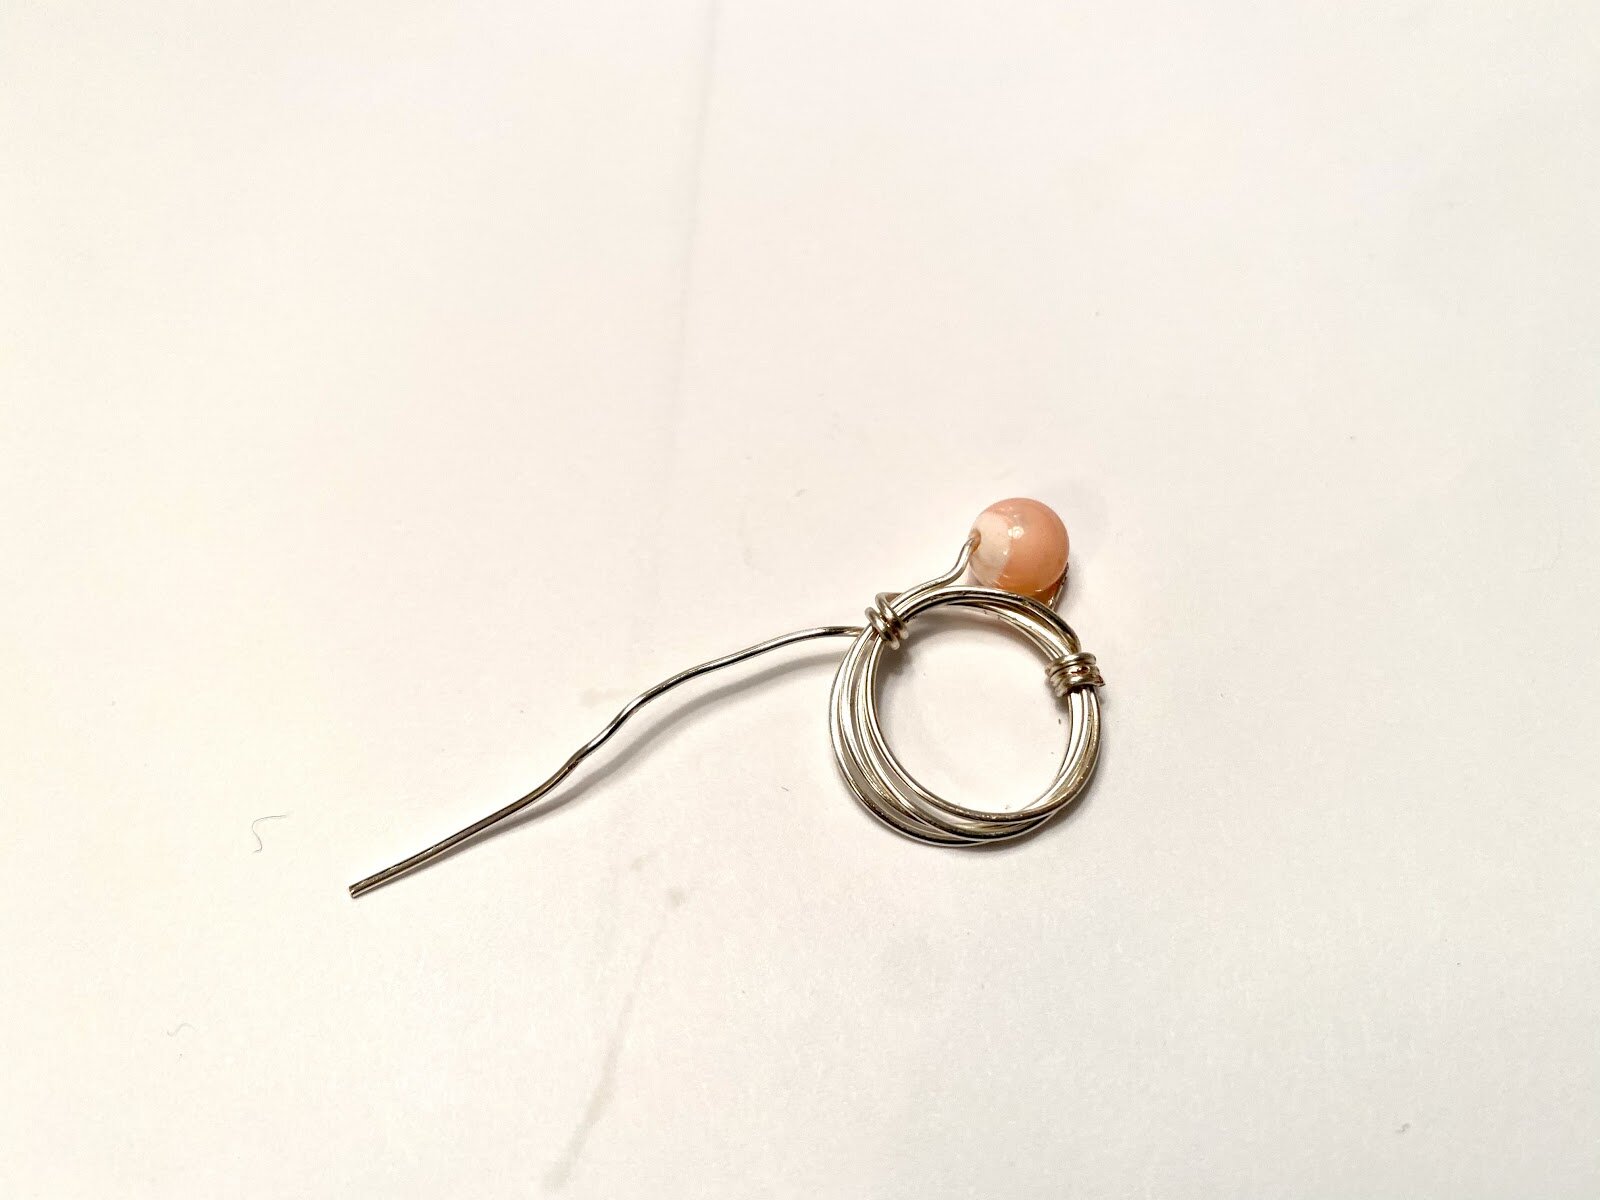
Put the bead in the center of the wire and bend the wire in half.


Step Three:
Wrap both sides of the wire around the cylinder a few times. If you have a ring sizer, this is when you want to use it. You can wrap the wire around the part that is the same size as your finger to get a more accurate fit.
Step Four:
Take the ring off of the cylinder. Carefully slide it off, so everything stays in place. There should be a few inches of wire left on either end. This is what you will use to wrap around the stone and band of the ring to make your unique design.
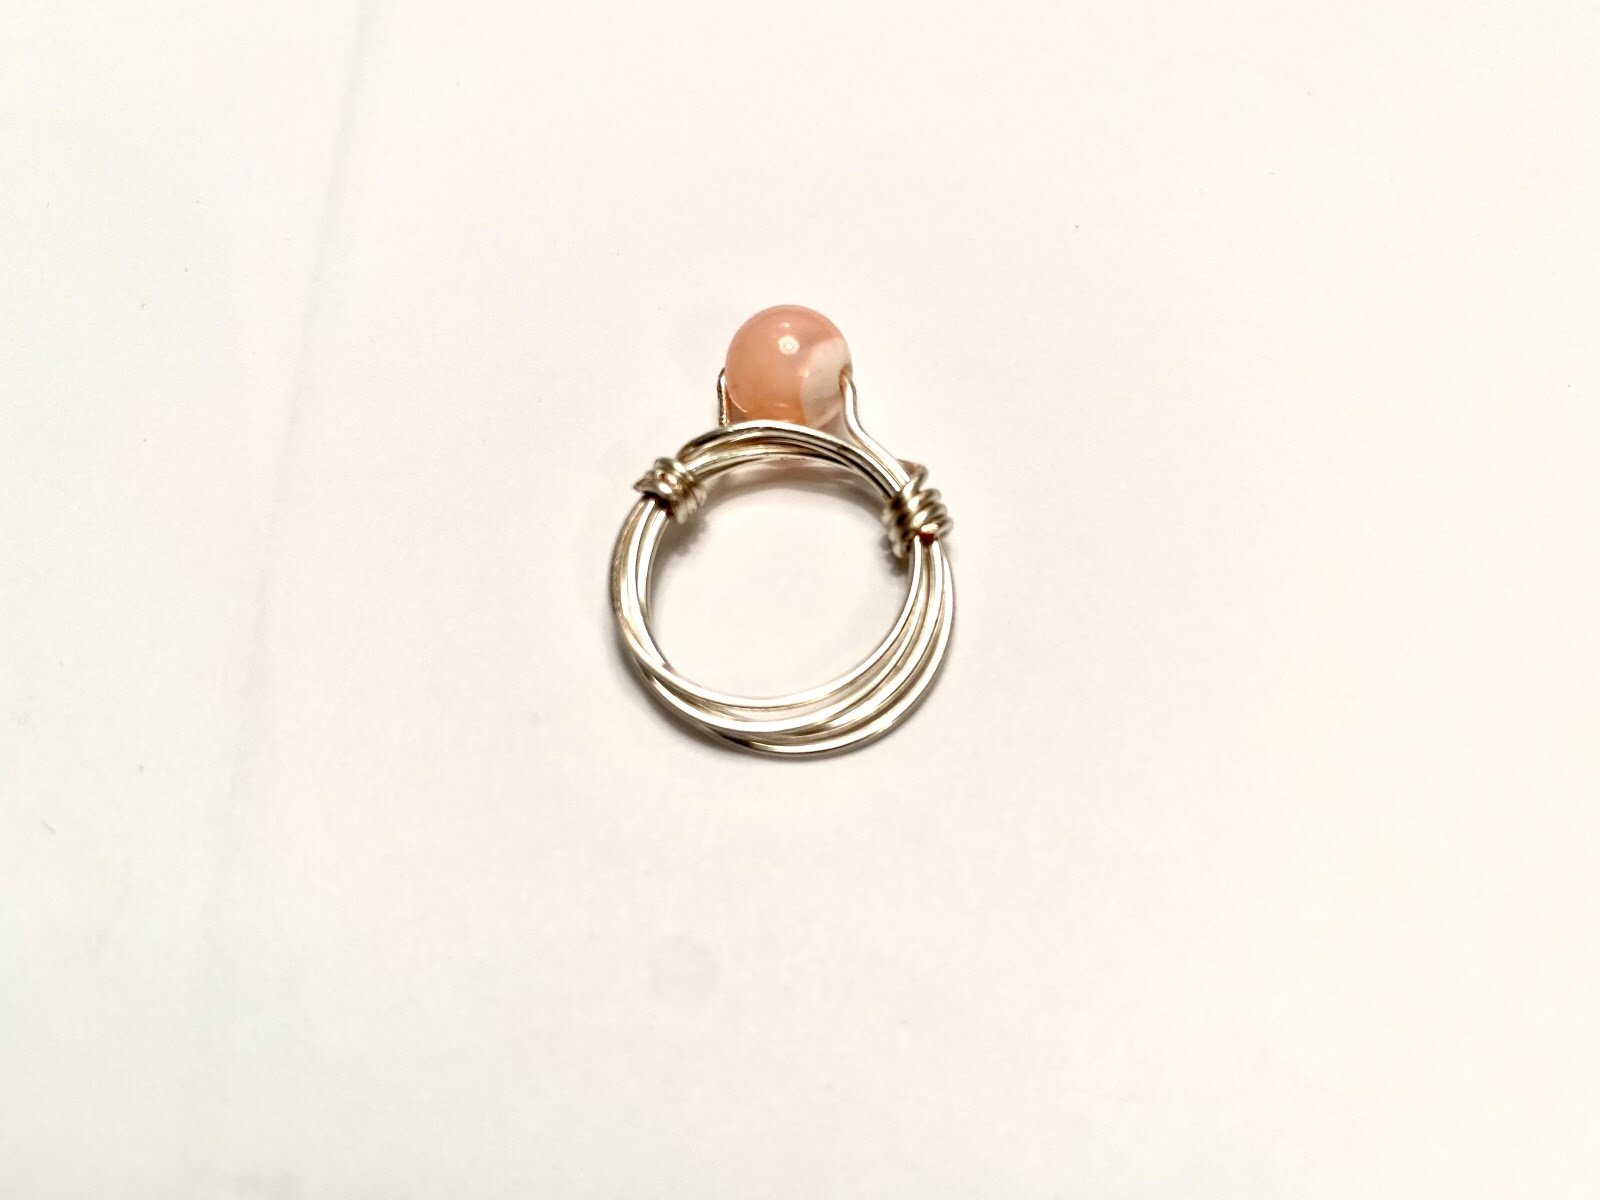
Step Five:
Wrap the wire around each side of the bead and the band using the pliers to get a neat and tight wrap. The wire is not too pricey, so you can experiment here and always cut the bead out and try again if you do not like the results; once you are done wrapping, clip any remaining wire with the wire cutters and use the pliers to squeeze and smooth out the ends, so they do not stick out at all.
Step 6:
Try on your ring, and then plan on making a bunch more because everyone from your friends to your mother will ask for one!